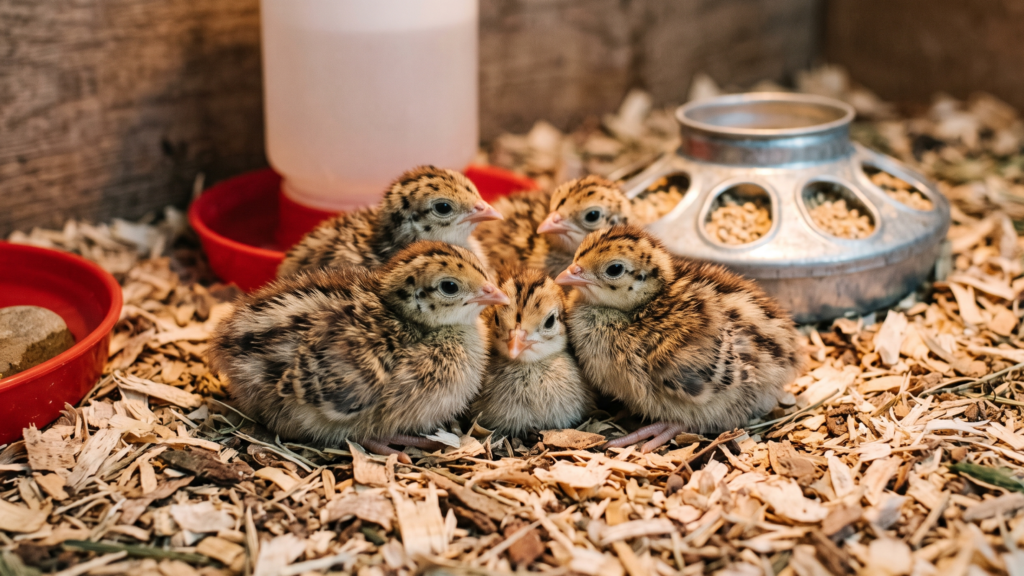
Raising guinea keets comes down to getting three things right in the first eight weeks: heat, protein, and dry footing. Nail those and you’ll go from a box of trembling fluffballs to a flock of confident, feathered keets ready for the run.
I still remember my first batch. Thirty keets arrived in a peeping box from the post office, and I spent that entire first night checking the brooder thermometer every hour like a new parent checking a crib. I made almost every mistake you can make — slick bedding, feed that was too low in protein, a heat lamp hung at the wrong angle. This guide is what I wish someone had handed me before that box showed up.
Below, I’ll walk you through exactly what your keets need, week by week, from the moment they arrive until they’re ready to move outside.
- Weeks 1–2: 95°F brooder, 28–30% protein starter, non-slip bedding only
- Weeks 3–4: Drop temperature 5°F weekly, widen the space, watch for pasty butt
- Weeks 5–6: Reduce protein to 20–22%, start supervised outdoor time on warm days
- Weeks 7–8: Full feathers in, heat lamp off, transition to outdoor housing
- After week 8: Move to a predator-proof coop and gradually shift to layer feed
Before Your Keets Arrive
Guinea keets are less forgiving than chicks during their first two weeks. They’re more sensitive to chilling, slower to figure out food and water on their own, and prone to a few problems chickens rarely deal with. Setting up the brooder correctly before your keets show up saves you from a rough first 48 hours.
Here’s what you need ready:
- A draft-free brooder — a large plastic tote, stock tank, or cardboard box works fine, sized for at least 1 square foot per keet to start
- A reliable heat source — a heat lamp with a porcelain socket or a radiant heat plate rated for the number of keets you have
- A brooder thermometer — don’t guess at temperature; keets can’t tell you they’re cold until they’re already piled in a corner
- Non-slip bedding — paper towels, rubber shelf liner, or unscented puppy pads for the first several days
- A shallow waterer — keets drown easily in anything deeper than an inch or two
- Game bird or turkey starter feed — standard chick starter doesn’t have enough protein for keets
If this is your first time keeping guineas at all, it’s worth reading through a general guide to getting started with guinea fowl farming before your keets arrive, since brooding is really just the first phase of a longer setup.
Week 1: Heat, Hydration, and Getting Them Eating
The first week is the most fragile stretch of a keet’s life. Most of what you’re doing is managing temperature and making sure every keet actually finds the food and water.
Temperature: Keep the brooder at 95°F for the first week, measured at keet height near the heat source, not at the edges of the brooder. Guinea fowl trace back to Africa, and poultry extension research notes they’re especially vulnerable to dampness during their first two weeks — a warm, dry brooder matters even more here than it does for chicks.
Bedding: Skip wood shavings for at least the first few days. Slick surfaces like newspaper cause spraddle leg, where a keet’s legs slide out sideways and it can’t stand to reach food or water. Paper towels or rubber shelf liner give their feet something to grip while their legs strengthen.
Feed and water: Guinea keets need a noticeably higher protein starter than chicks — most keepers land in the 28–30% range for the first few weeks, using a game bird or turkey starter rather than standard chick crumble. Dip each keet’s beak gently into the water when you first set them in the brooder so they learn where it is. Add marbles or clean pebbles to the water dish for the first couple of days to prevent drowning.
What to watch for: Pasty butt — dried droppings blocking the vent — is common in the first week. Clean it gently with a warm, damp cloth, and dry the keet fully afterward so it doesn’t get chilled in the process. If keets are piled directly under the heat source and cheeping loudly, they’re cold; if they’re pressed against the brooder walls avoiding the light, they’re too hot.
Week 2: Watching for Confidence and Spread
By the second week, healthy keets are noticeably more active — darting around, testing their legs, and pecking at bedding out of curiosity rather than just huddling.
- Drop the brooder temperature to around 90°F
- You can typically introduce wood shavings now, once legs have strengthened enough to grip properly
- Increase floor space as they grow to avoid crowding, which drives pecking and stress
- Continue the 28–30% protein starter
This is also the point where keets start recognizing you as the source of food, which makes handling easier later if you spend a few minutes a day near the brooder.
Weeks 3–4: Temperature Steps Down, Feathers Start In
Guinea keets typically stay in the brooder for 6 to 8 weeks — a couple weeks longer than the usual chick brooder period — because they take longer to grow in their protective feathering. Weeks three and four are where you’ll see the first real pin feathers coming in along the wings.
Keep stepping the temperature down by about 5°F each week, so you’re around 80–85°F by the end of week four. Watch the keets’ behavior more than the thermometer — contentedly spread out and exploring means they’re comfortable; huddled together means it’s still too cold.
Feed-wise, this is a good stretch to double-check protein content on the bag. Keets started on a standard 18–20% chick crumble instead of a proper game bird formula tend to feather more slowly and see higher losses in these early weeks, so it’s worth the extra cost of the correct starter through at least week five. For a deeper look at protein needs and feed types across every life stage, our feeding and nutrition guide covers it in more detail.
Keep bedding clean and dry through this stretch — damp bedding is one of the fastest routes to coccidiosis, which shows up as diarrhea and lethargy in young keets.
Weeks 5–6: Lower Protein, More Space, First Outdoor Time
Around week five, most keepers start easing the protein level down. A drop to roughly 20–22% protein is common through week eight, transitioning from game bird starter toward a standard grower feed.
By now your keets should be reasonably feathered, though down patches often remain on the head and neck. If daytime temperatures are consistently above 70°F, you can start short supervised outdoor sessions — 20 to 30 minutes in a secure, shaded pen — to let them get used to natural light and ground texture without the risk of a sudden chill.
Keep them in a covered pen for these outings. Hawks are a real threat to keets this size, and guinea keets don’t yet have the flight speed or flock instincts to avoid a swoop the way adult guineas do.
Weeks 7–8: Full Feathers, Heat Lamp Off
By the time keets are fully feathered, usually around six to eight weeks, they should be able to handle ambient temperature without supplemental heat. Check for down patches on the head, under the wings, and around the vent — those are the last spots to feather out, and I’ve had keets look “done” from a distance while still carrying a bare patch that needed another week.
Once feathering is complete and nighttime lows are staying above about 65°F, you can turn the heat lamp off during the day and monitor overnight. Some keepers leave a low-wattage backup heat source in one corner for the first few nights after removing the main lamp, just in case of a cold snap.
This is also roughly when you can begin the shift toward a lower-protein grower or starter-grower blend, phasing out the high-protein game bird feed as they approach outdoor housing.
Moving Keets to Outdoor Housing
Once keets are fully feathered and holding steady body temperature on their own, they’re ready to move into permanent housing — but not straight into full free range yet.
A few things make this transition smoother:
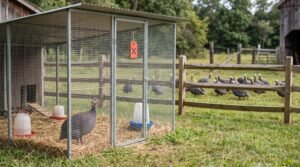
- Confine them to the coop and an attached run for two to four weeks after the move, even if your adult guineas free-range. This teaches keets where “home” is, which matters enormously later — a guinea that doesn’t imprint on its coop will roost in trees instead of coming in at night.
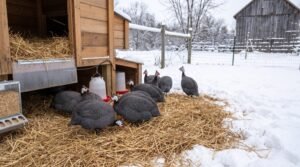
- Provide a low-wattage heat source in one corner for the first couple of weeks outdoors, especially if nights are still cool.
- Introduce them to adult guineas gradually, if you have an existing flock, rather than dropping them in all at once.
- Check the coop for gaps small enough for a half-grown keet to squeeze through, since they’re still smaller and more vulnerable than adult birds.
If you’re still finalizing your setup, our guide to guinea fowl coop design and space requirements covers sizing and predator-proofing in more depth, and it’s worth reviewing before the move-out date rather than after. It’s also a good time to think ahead to protecting the flock from hawks and other predators, since half-grown keets are still an easy target for anything overhead.
Common Problems During Brooding
A few issues come up often enough in the first eight weeks that it’s worth knowing what they look like before you’re troubleshooting them at 11 p.m.
| Problem | Likely Cause | What to Do |
|---|---|---|
| Spraddle leg | Slick brooder flooring | Switch to non-slip bedding immediately; hobble legs loosely with a small bandage if needed |
| Pasty butt | Stress or feed transition | Clean gently with a warm damp cloth; keep the keet dry and warm afterward |
| Piling/huddling | Brooder too cold | Lower the heat source or add another; recheck with a thermometer |
| Avoiding the heat source | Brooder too hot | Raise the lamp or move it farther away |
| Lethargy, diarrhea | Possible coccidiosis | Clean and dry the bedding immediately; consult a vet or consider medicated starter |
| Leg twisting (2–6 weeks) | Possibly linked to very high-protein confinement diets | Keep protein in the recommended range rather than pushing it higher than needed; allow floor space |
If you’re seeing symptoms beyond mild pasty butt or a one-off cold night, it’s worth reading through a broader rundown of guinea fowl diseases and their treatment so you can rule out anything more serious early, while it’s still easiest to treat.
Frequently Asked Questions
How long do guinea keets need a heat lamp?
Most keets need supplemental heat for 6 to 8 weeks, until they’re fully feathered and nighttime temperatures are reliably above 65°F. Some keepers keep a low backup heat source available for another week or two after the main lamp comes off.
Can I raise guinea keets with chicks?
Yes, keets are commonly brooded alongside chicks, and many keepers find it helps keets settle faster. The main adjustment is feed — chicks don’t need the higher protein level keets require, so you’ll want to feed the higher-protein starter to the whole brooder, or separate feeders if that’s not practical.
Why do my keets keep piling on top of each other?
Piling almost always means they’re cold. Check the brooder temperature at keet height, not just the ambient room temperature, and lower the heat source slightly if needed.
When can I tell males from females?
Not reliably until around 8 to 12 weeks, and even then it takes practice with voice and behavior differences rather than appearance alone.
Raising keets through those first eight weeks is really a matter of consistency — checking the thermometer, keeping the bedding dry, and not skimping on protein even when the bag costs more than you expected. Get through that window and guineas turn into one of the hardiest birds you can keep. What’s tripping you up most with your current batch — heat, feed, or something else? I’d genuinely like to hear how your brooder setup is going.
Hi, I’m Rayyan. I raise guinea fowl and share practical, research-backed guides for backyard keepers and homesteaders. I combine hands-on flock experience with trusted poultry management and university extension resources to help you raise healthier, more productive birds — with confidence, not guesswork.